What are Allow Lists?
Plan restrictions: Teams on Scale Plan and above Every Node API endpoint key now has an Allow Lists tab. For those teams on qualifying plans, this lets you restrict which clients may use Node API endpoint keys in two ways:- Allowed IPs, this is sometimes known as whitelisting IPs: only requests coming from these IPv4 addresses or CIDR ranges are served.
- Allowed origins: only requests from these web origins (protocol://hostname:port) are served. This is for browser apps that call the endpoint directly from the user’s browser.
Where it is and who can use it
-
Node API: app.validationcloud.io/node
- Click on one of your endpoints or create a new one
- Then, click the Allow Lists tab, example screenshot below:
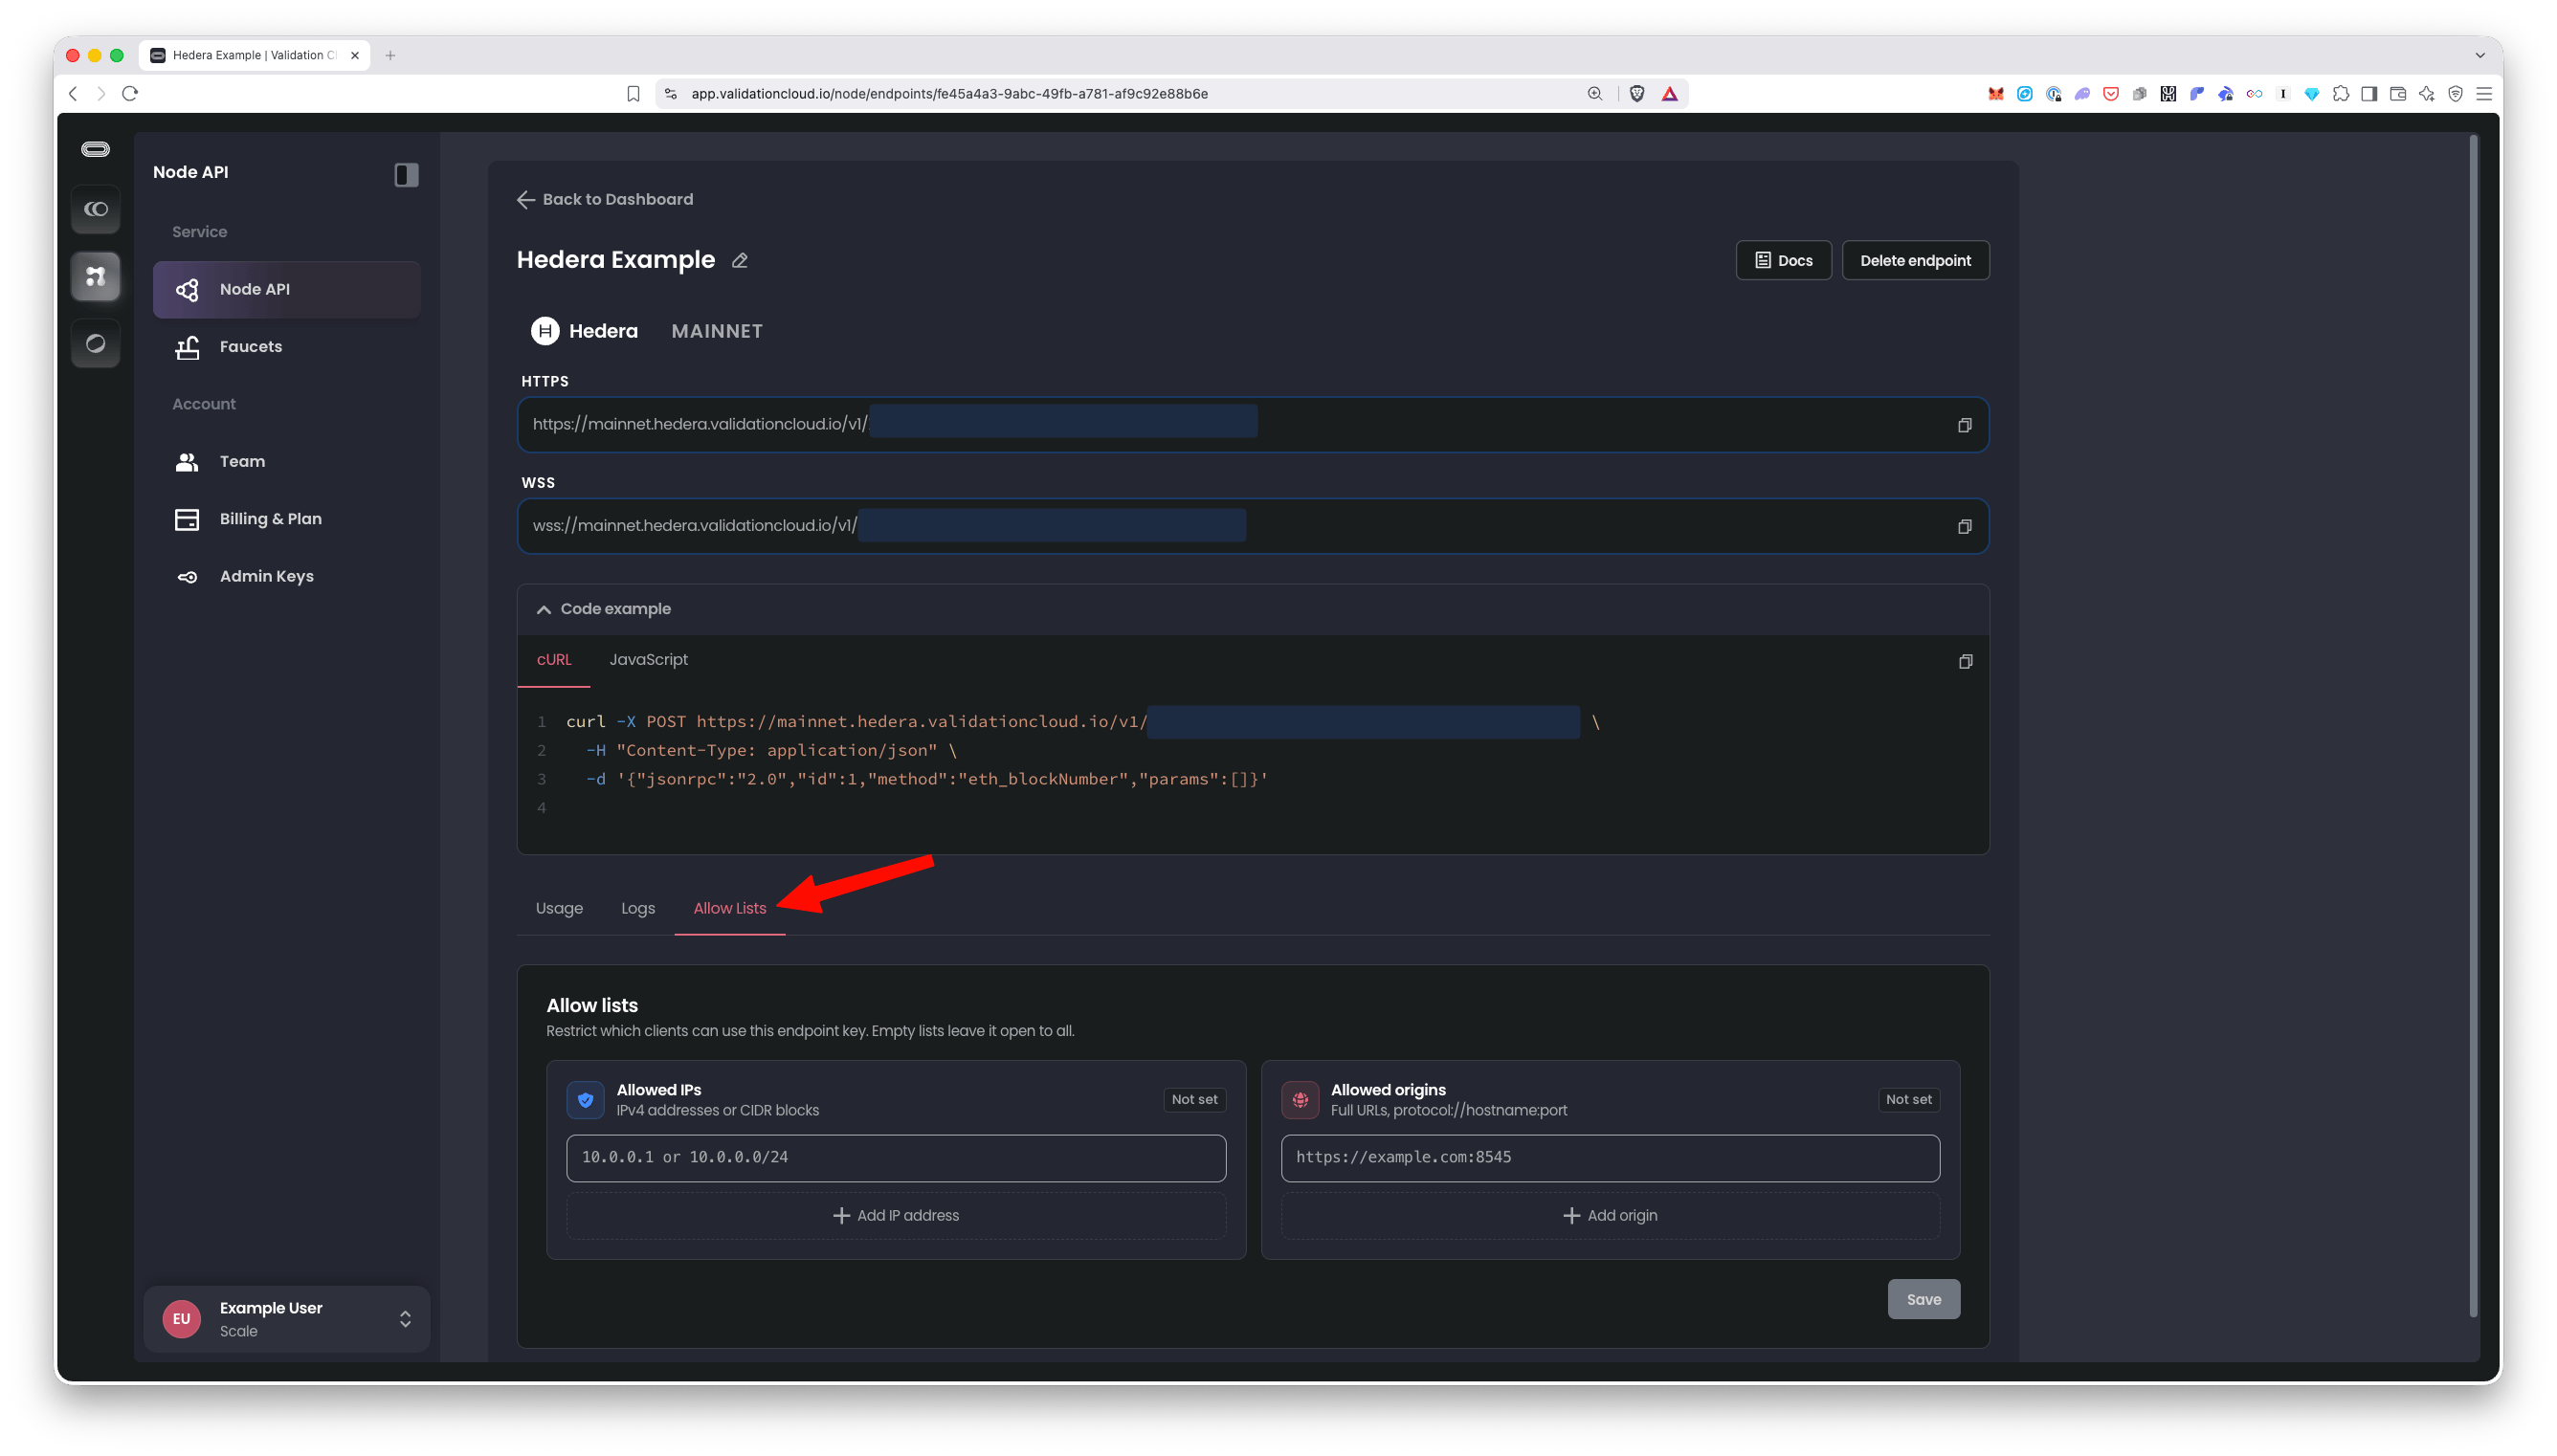
- Plans: Scale and Private. Free teams see the tab but with an “Unlock allow lists with Scale” overlay and an Upgrade button.
- Roles: only Team Admins can add, remove or save entries. Team Members can view the saved lists but cannot edit them. If nothing is set, members see “None, open to all”.
- The Node API user interface is the only place to set Allow Lists for endpoints, this functionality is not currently in the Admin API.
How to create or edit Allow Lists for a Node API endpoint key
- Go to Node API and click on the endpoint you want to restrict.
- Select the Allow Lists tab (Note you need to be a Team Admin in a Scale or Private plan to modify Allow Lists as described below)
-
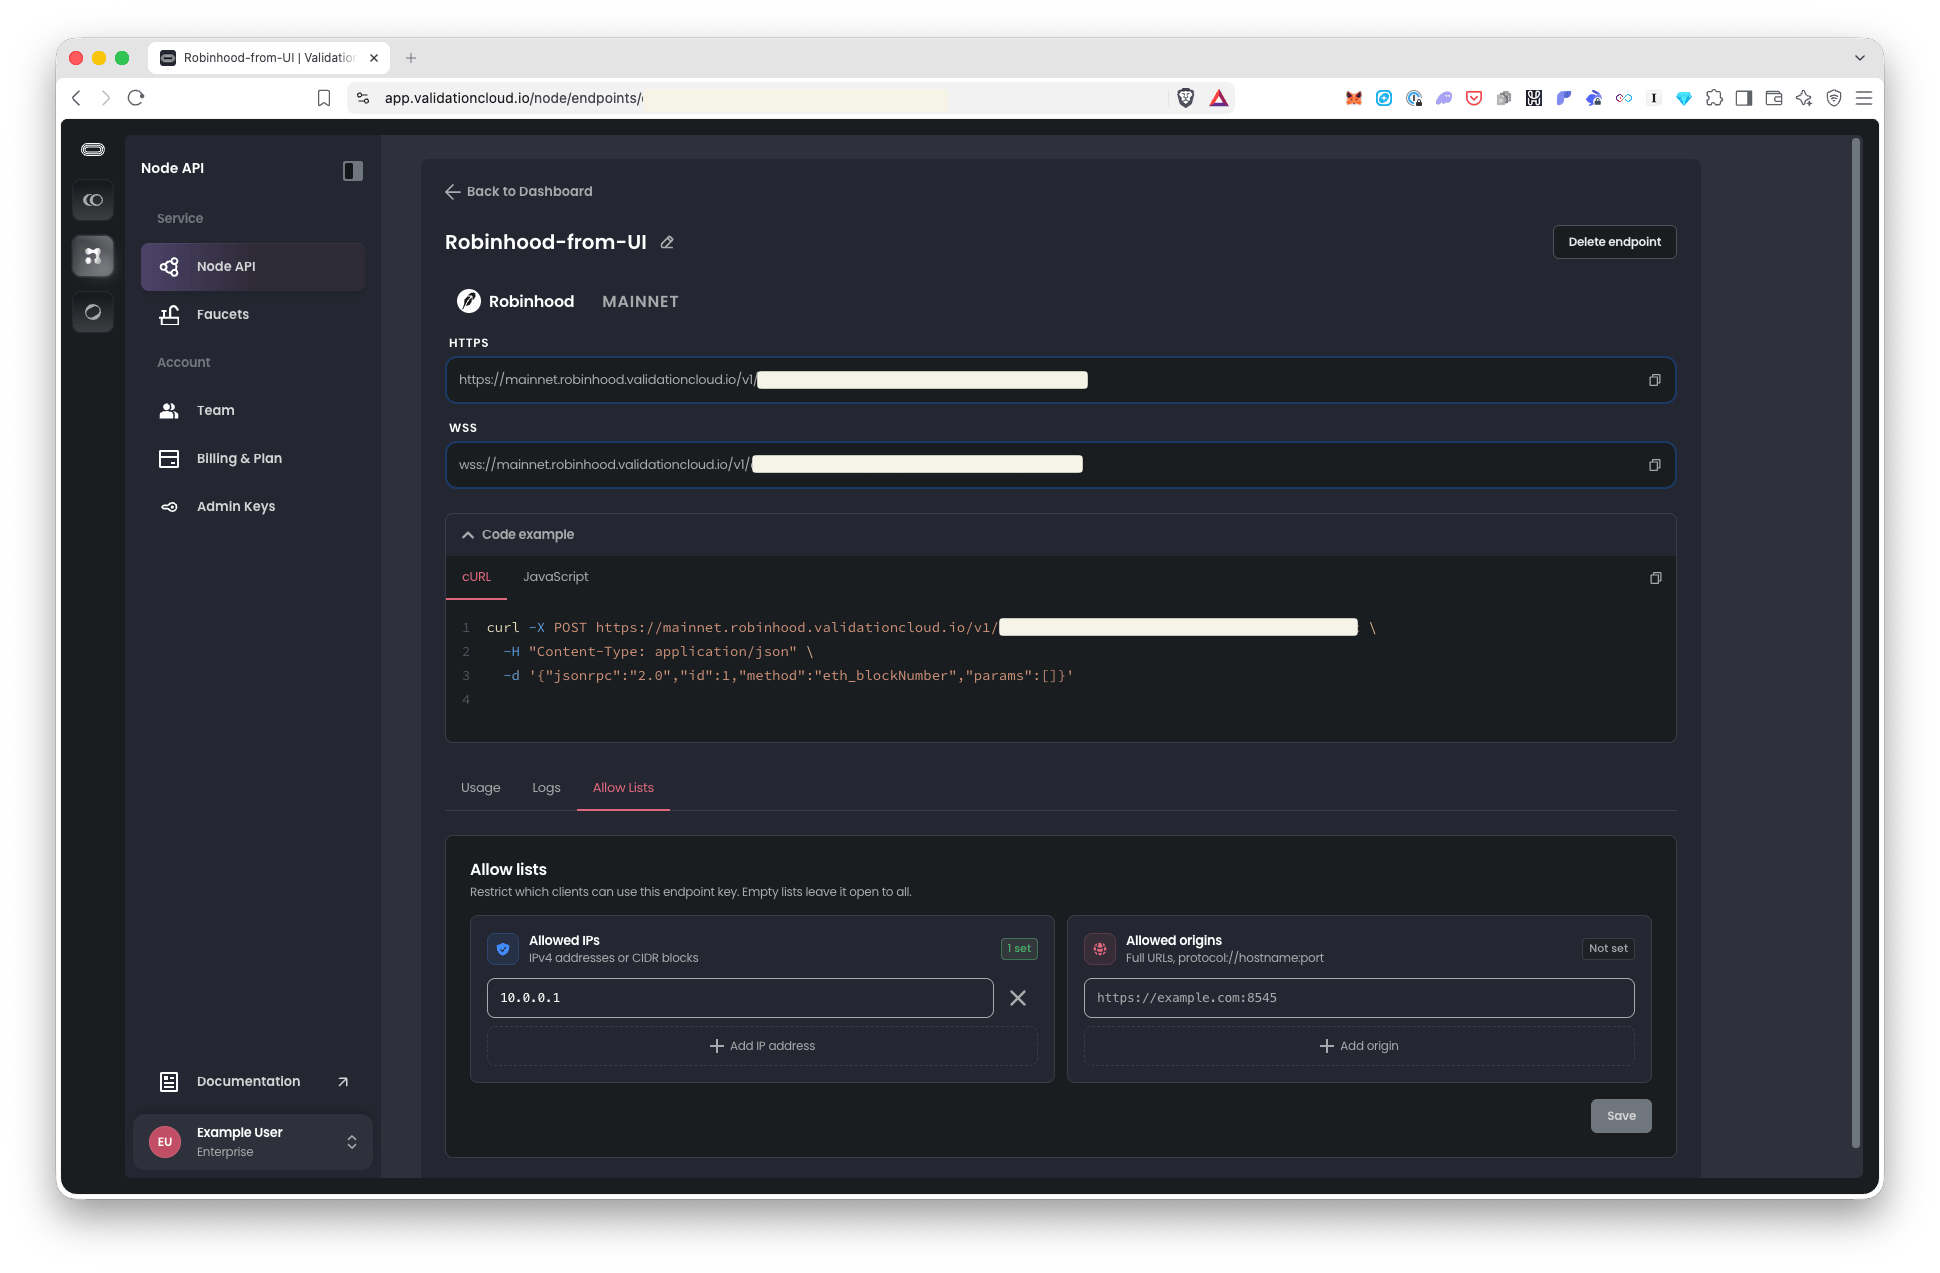
Under Allowed IPs, click Add IP address and enter an IPv4 address or CIDR range. Repeat for each address. Example screenshot:
- Under Allowed origins, click Add origin and enter the full URL of the site that will call the endpoint from the browser.
- Click Save. Changes apply within a few minutes.
- To remove a restriction, click the X next to an entry. To reopen the key to all clients, remove all entries and click Save.
curl https://api.ipify.org from the server)
How it works
Formats- IPs: IPv4 only, either a single address (203.0.113.24) or a CIDR block (198.51.100.0/24), wildcards are not accepted, IP ranges are the way to cover many addresses.
- Origins: a full URL with a protocol and host, for example
https://app.example.comorhttps://staging.example.com:8545. The port matters if specified, for instancehttps://example.comandhttps://example.com:8545are different origins.
- A request must pass both lists if both are set. The IP check runs first.
- An empty list means “no restriction” for that list. Remove every row and Save to reopen a key.
- The IP we check is the public IP the request arrives from. Customers behind NAT, a corporate proxy or a cloud NAT gateway need to allow their egress IP, not a machine’s private address.
- Applies to HTTPS and WebSocket endpoints alike. For WebSockets the check happens when the connection is opened.
When a request is blocked, what does it look like?
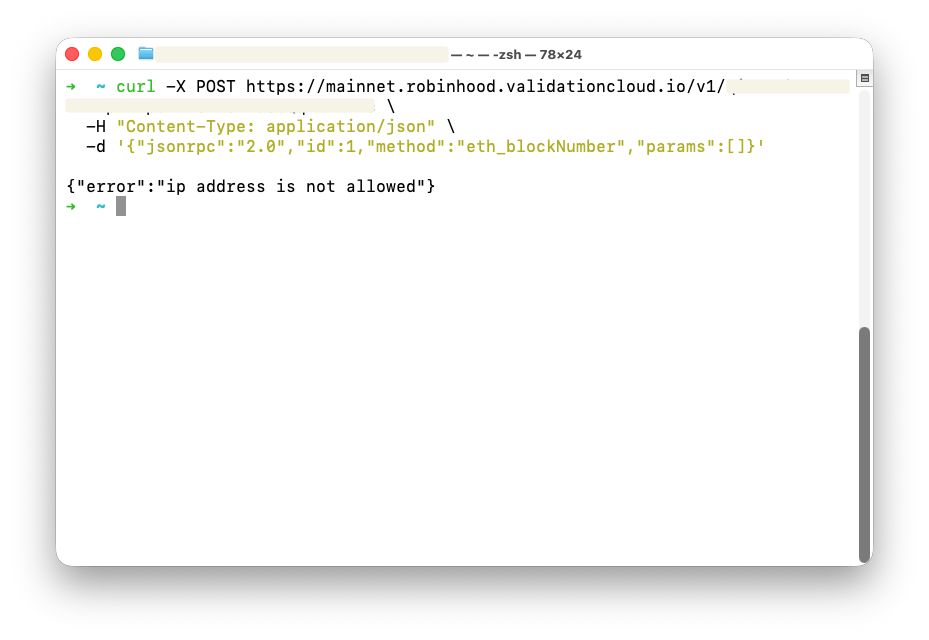
IP Not Allowed HTTP 403 with a small JSON body. This is not a JSON-RPC error object, so RPC libraries usually surface it as an HTTP error.